1. 概述
Apache Cayenne 是一个开源库,采用 Apache 许可证分发。它提供了建模工具、对象关系映射(ORM)用于本地持久化操作,以及远程服务等功能。
在接下来的章节中,我们将演示如何使用 Apache Cayenne ORM 与 MySQL 数据库交互。
2. Maven 依赖
首先,只需添加以下依赖即可引入 Apache Cayenne 和 MySQL 连接器(JDBC 驱动),用于访问我们的 intro_cayenne 数据库:
<dependency>
    <groupId>org.apache.cayenne</groupId>
    <artifactId>cayenne-server</artifactId>
    <version>4.0.M5</version>
</dependency>
<dependency>
    <groupId>mysql</groupId>
    <artifactId>mysql-connector-java</artifactId>
    <version>5.1.44</version>
    <scope>runtime</scope>
</dependency>
接下来配置 Cayenne 建模插件,它用于设计或设置映射文件(作为数据库模式和 Java 对象之间的桥梁):
<plugin>
    <groupId>org.apache.cayenne.plugins</groupId>
    <artifactId>maven-cayenne-modeler-plugin</artifactId>
    <version>4.0.M5</version>
</plugin>
⚠️ 手动编写 XML 映射文件(极少见)不推荐,建议使用 Cayenne 自带的建模工具——这是一个相当高级的工具。
它可根据操作系统从归档文件下载,或直接使用上面 Maven 插件包含的跨平台版本(JAR)。
Maven 中央仓库托管了最新版本的 Apache Cayenne、建模插件 和 MySQL Connector。
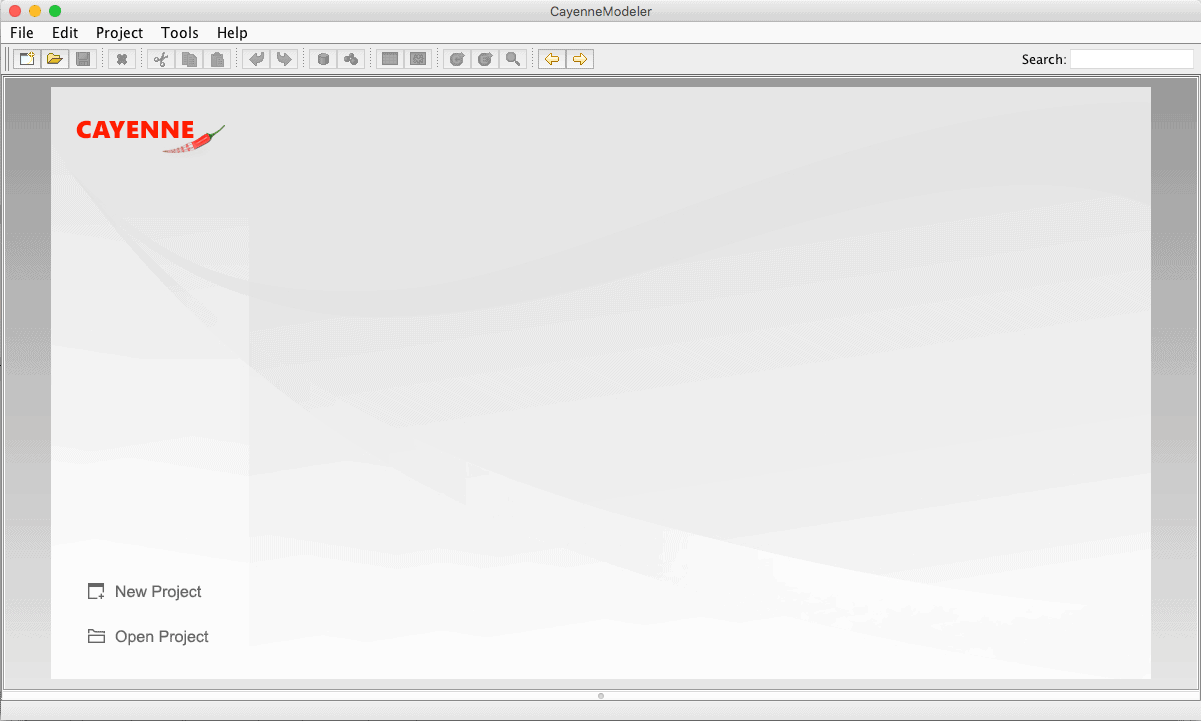
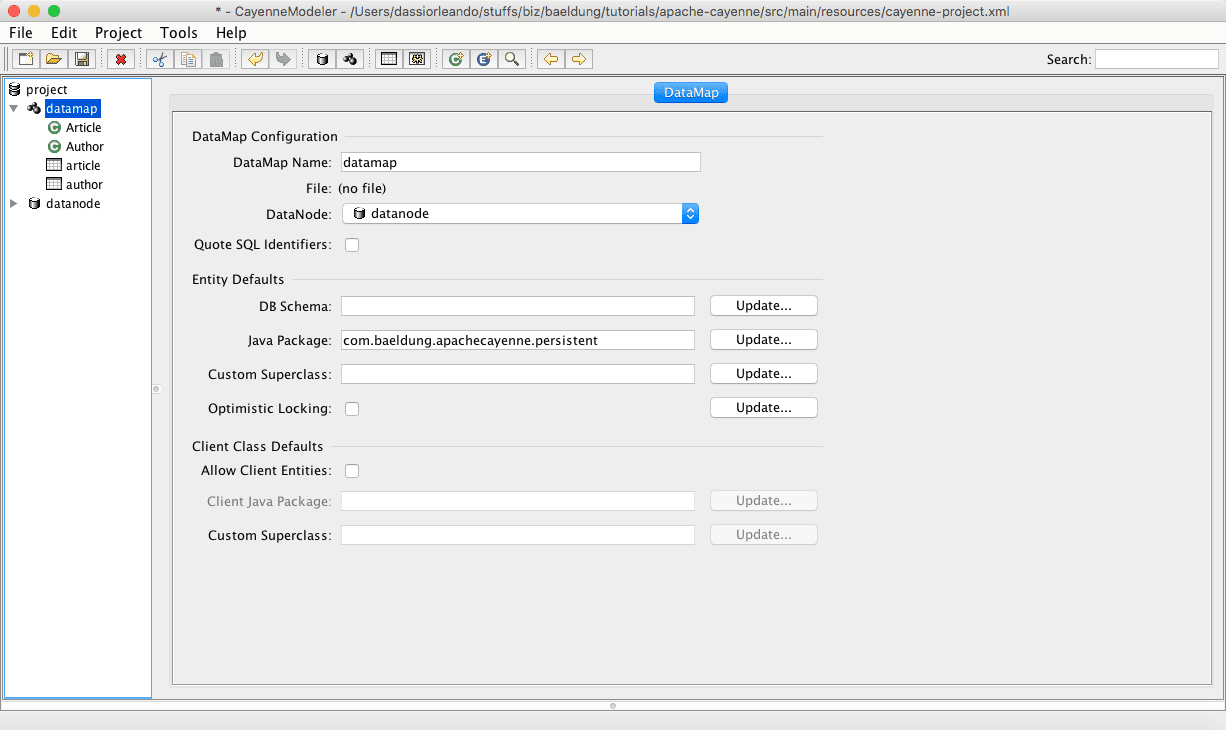
执行 mvn install 构建项目后,通过命令 mvn cayenne-modeler:run 启动建模 GUI,将显示如下界面:
3. 配置
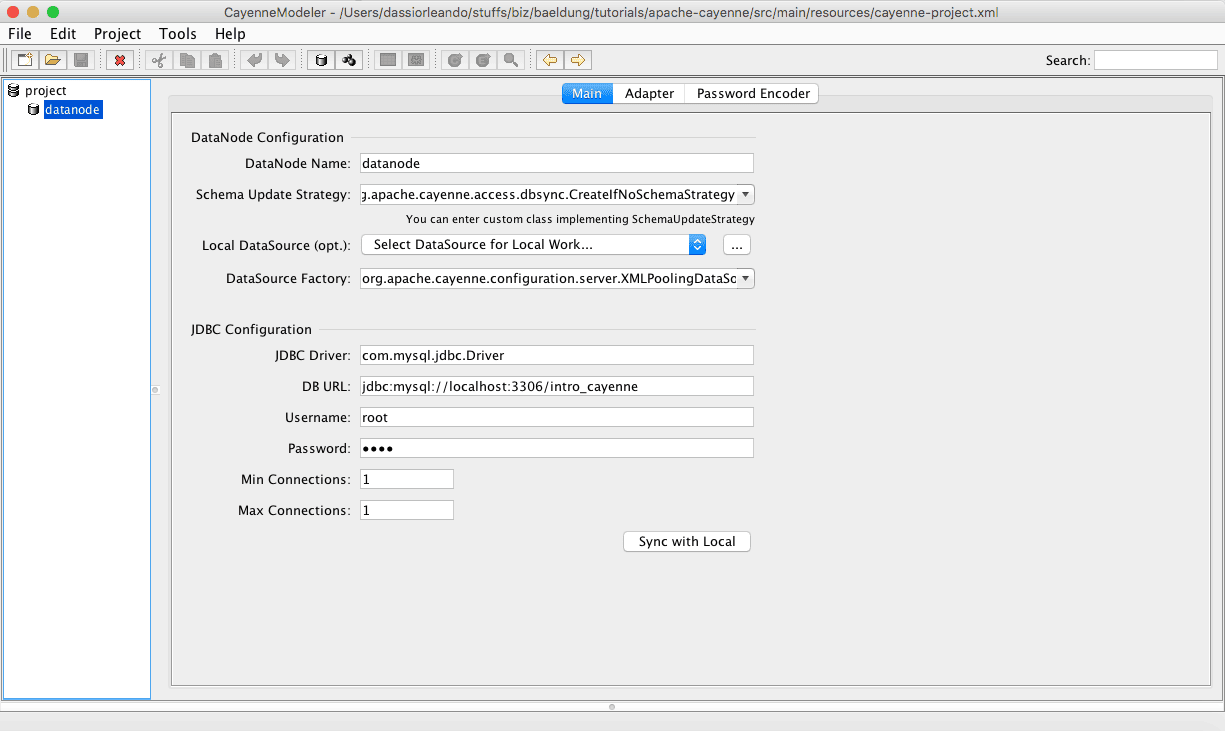
要让 Apache Cayenne 正确定位本地数据库,只需在 resources 目录下的 cayenne-project.xml 文件中配置正确的驱动、URL 和用户信息:
<?xml version="1.0" encoding="utf-8"?>
<domain project-version="9">
    <node name="datanode"
          factory="org.apache.cayenne.configuration.server.XMLPoolingDataSourceFactory"
          schema-update-strategy="org.apache.cayenne.access.dbsync.CreateIfNoSchemaStrategy">
        <data-source>
            <driver value="com.mysql.jdbc.Driver"/>
            <url value="jdbc:mysql://localhost:3306/intro_cayenne;create=true"/>
            <connectionPool min="1" max="1"/>
            <login userName="root" password="root"/>
        </data-source>
    </node>
</domain>
关键配置说明:
- 本地数据库名为
intro_cayenne - 若数据库不存在,Cayenne 会自动创建
- 使用用户名
root和密码root(根据你的数据库系统配置修改)
内部由 XMLPoolingDataSourceFactory 负责从与 DataNodeDescriptor 关联的 XML 资源加载 JDBC 连接信息。
⚠️ 这些参数与数据库管理系统和 JDBC 驱动相关,因为该库支持多种数据库。每种数据库都有对应的适配器,详见支持列表。
4. 映射与数据库设计
4.1 建模
点击 *"Open Project"*,导航到项目的 resources 文件夹并选择 cayenne-project.xml,建模器将显示如下:
此时有两种选择:从现有数据库创建映射结构 或 手动操作。本文将演示使用建模器和现有数据库的方式,帮助快速上手 Cayenne。
查看我们的 intro_cayenne 数据库,它包含两个具有一对多关系的表(一个作者可发表多篇文章):
author: id (主键) 和 namearticle: id (主键), title, content 和 author_id (外键)
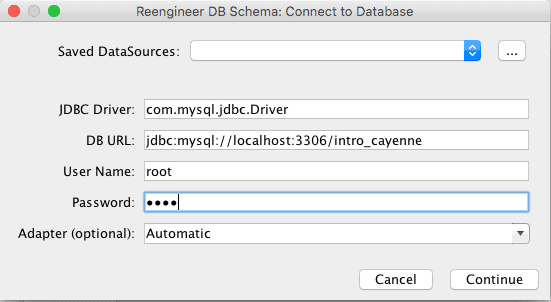
进入 *"Tools > Reengineer Database Schema"*,所有映射配置将自动填充。在提示界面填写 cayenne-project.xml 中的数据源配置并点击继续:
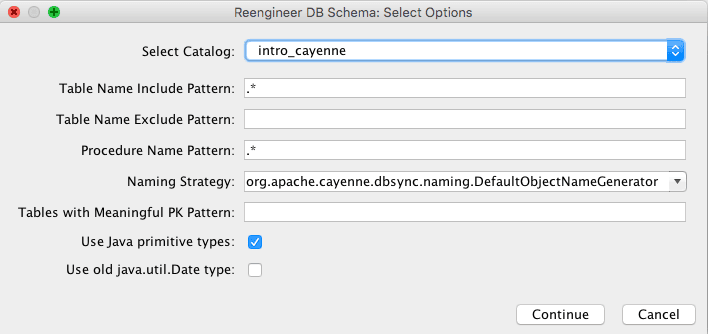
在下一界面勾选 *"Use Java primitive types"*:
确保设置 Java 包为 com.baeldung.apachecayenne.persistent 并保存。XML 配置文件的 defaultPackage 属性将自动更新:
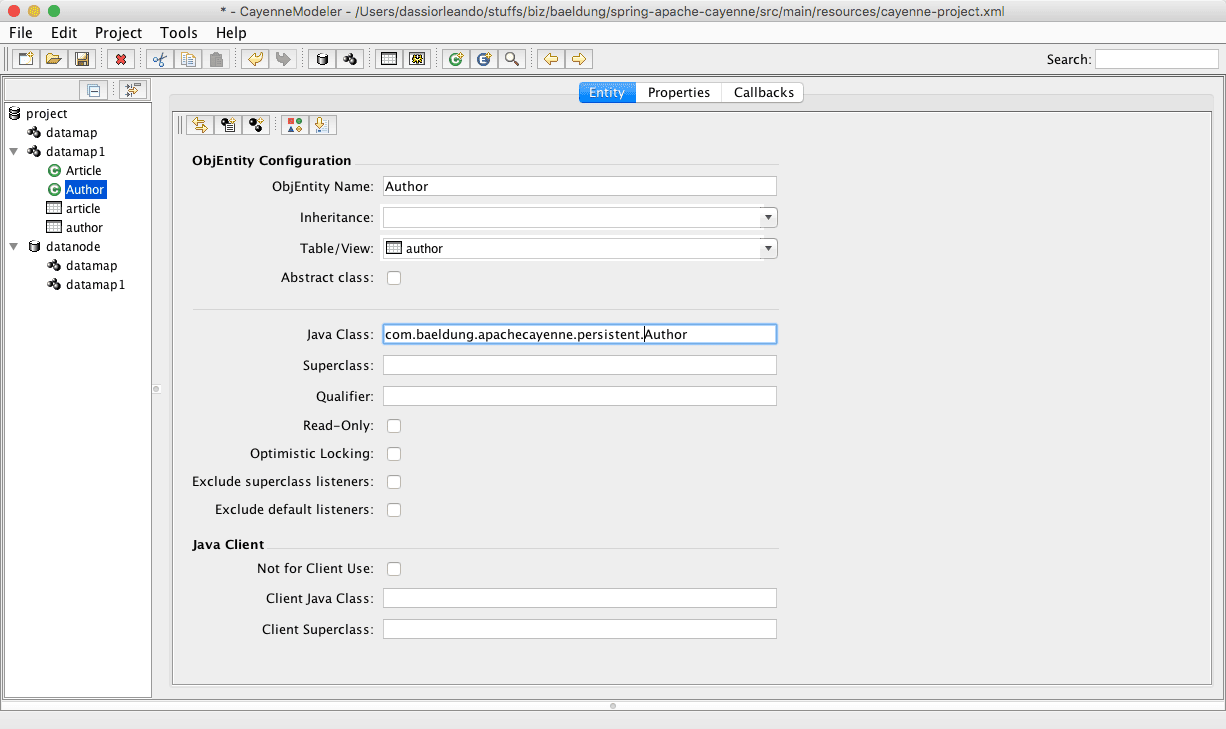
在每个 ObjEntity 中指定子类的包名(如下图所示),再次点击 "save" 图标:
进入 "Tools > Generate Classes" 菜单,选择 "Standard Persistent Objects" 类型;在 "Classes" 选项卡勾选所有类并点击 *"generate"*。
回到源码目录,将看到生成的持久化类 _Article.java 和 _Author.java。
✅ 所有配置保存在 resources 文件夹下的 datamap.map.xml 文件中。
4.2 映射结构
生成的 XML 映射文件使用了 Apache Cayenne 特有的标签:
| 标签 | 说明 |
|---|---|
DataNode(<node>) |
数据库模型,包含连接所需信息(数据库名、驱动、凭据) |
DataMap(<data-map>) |
持久化实体及其关系的容器 |
DbAttribute(<db-attribute>) |
数据库表的列 |
DbEntity(<db-entity>) |
单个数据库表或视图的模型,可包含 DbAttributes 和关系 |
ObjEntity(<obj-entity>) |
单个持久化 Java 类的模型,由 ObjAttributes(实体属性)和 ObjRelationships(其他实体类型的属性)组成 |
Embeddable(<embeddable>) |
作为 ObjEntity 属性的 Java 类模型,对应数据库多列 |
Procedure(<procedure>) |
注册数据库存储过程 |
Query(<query>) |
查询模型,用于在配置文件中映射查询(也可在代码中实现) |
完整细节见官方文档。
5. Cayenne API
最后一步是使用 Cayenne API 和生成的类进行数据库操作。子类化持久化类是最佳实践,便于后续模型定制。
5.1 创建对象
保存一个 Author 对象,并验证数据库中仅有一条记录:
@Test
public void whenInsert_thenWeGetOneRecordInTheDatabase() {
    Author author = context.newObject(Author.class);
    author.setName("Paul");

    context.commitChanges();

    long records = ObjectSelect.dataRowQuery(Author.class)
      .selectCount(context);

    assertEquals(1, records);
}
5.2 读取对象
保存 Author 后,通过特定属性查询获取:
@Test
public void whenInsert_andQueryByFirstName_thenWeGetTheAuthor() {
    Author author = context.newObject(Author.class);
    author.setName("Paul");

    context.commitChanges();

    Author expectedAuthor = ObjectSelect.query(Author.class)
      .where(Author.NAME.eq("Paul"))
      .selectOne(context);

    assertEquals("Paul", expectedAuthor.getName());
}
5.3 获取类的所有记录
保存两个作者后,验证仅能查询到这两条记录:
@Test
public void whenInsert_andQueryAll_thenWeGetTwoAuthors() {
    Author firstAuthor = context.newObject(Author.class);
    firstAuthor.setName("Paul");

    Author secondAuthor = context.newObject(Author.class);
    secondAuthor.setName("Ludovic");

    context.commitChanges();

    List<Author> authors = ObjectSelect
      .query(Author.class)
      .select(context);

    assertEquals(2, authors.size());
}
5.4 更新对象
更新操作也很简单,先获取对象再修改属性并提交:
@Test
public void whenUpdating_thenWeGetAnUpatedeAuthor() {
    Author author = context.newObject(Author.class);
    author.setName("Paul");
    context.commitChanges();

    Author expectedAuthor = ObjectSelect.query(Author.class)
      .where(Author.NAME.eq("Paul"))
      .selectOne(context);
    expectedAuthor.setName("Garcia");
    context.commitChanges();

    assertEquals(author.getName(), expectedAuthor.getName());
}
5.5 关联对象
将文章分配给作者:
@Test
public void whenAttachingToArticle_thenTheRelationIsMade() {
    Author author = context.newObject(Author.class);
    author.setName("Paul");

    Article article = context.newObject(Article.class);
    article.setTitle("My post title");
    article.setContent("The content");
    article.setAuthor(author);

    context.commitChanges();

    Author expectedAuthor = ObjectSelect.query(Author.class)
      .where(Author.NAME.eq("Smith"))
      .selectOne(context);

    Article expectedArticle = (expectedAuthor.getArticles()).get(0);

    assertEquals(article.getTitle(), expectedArticle.getTitle());
}
5.6 删除对象
删除操作会从数据库中彻底移除记录,后续查询将返回 null:
@Test
public void whenDeleting_thenWeLostHisDetails() {
    Author author = context.newObject(Author.class);
    author.setName("Paul");
    context.commitChanges();

    Author savedAuthor = ObjectSelect.query(Author.class)
      .where(Author.NAME.eq("Paul"))
      .selectOne(context);
    if(savedAuthor != null) {
        context.deleteObjects(author);
        context.commitChanges();
    }

    Author expectedAuthor = ObjectSelect.query(Author.class)
      .where(Author.NAME.eq("Paul"))
      .selectOne(context);

    assertNull(expectedAuthor);
}
5.7 删除类的所有记录
使用 SQLTemplate 清空表数据(在测试后执行,确保每次测试前数据库为空):
@After
public void deleteAllRecords() {
    SQLTemplate deleteArticles = new SQLTemplate(
      Article.class, "delete from article");
    SQLTemplate deleteAuthors = new SQLTemplate(
      Author.class, "delete from author");

    context.performGenericQuery(deleteArticles);
    context.performGenericQuery(deleteAuthors);
}
6. 总结
本教程演示了如何使用 Apache Cayenne ORM 轻松实现一对多关系的 CRUD 操作。
本文源代码可在 GitHub 获取。