1. 概述
k9s 是一个基于终端的用户界面(TUI),用于管理 Kubernetes 集群。虽然 kubectl 是官方推荐的与 Kubernetes 交互的命令行工具,但 k9s 作为补充,提供了更直观的终端界面。它在命令行效率和图形界面清晰性之间架起了一座桥梁,将集群信息以结构化、易于理解的方式呈现出来。
在本文中,我们将学习如何使用 k9s 命令行工具来管理 Kubernetes 集群。
2. 开始使用 k9s
本节介绍如何安装 k9s,并演示如何通过不同参数启动 TUI 界面。
2.1 安装
要安装 k9s,可以从其 GitHub 发布页面 获取 Linux 二进制包链接。下载并解压:
$ wget https://github.com/derailed/k9s/releases/download/v0.32.5/k9s_Linux_amd64.tar.gz
$ tar -xzf k9s_Linux_amd64.tar.gz
最后将 k9s 移动到 /usr/local/bin 目录下:
$ sudo mv k9s /usr/local/bin/
这样就能通过 PATH 环境变量全局调用 k9s 命令。
2.2 配置 .kube/config 文件
与 kubectl 类似,k9s 也通过读取 .kube/config 文件获取集群连接信息。
可以使用 kubectl config 命令或手动编辑配置文件添加集群信息。
为了演示,我们使用 kind 快速创建一个本地集群:
$ kind create cluster
Creating cluster "kind" ...
 ✓ Ensuring node image (kindest/node:v1.31.0) 🖼
 ...
Set kubectl context to "kind-kind"
You can now use your cluster with:

kubectl cluster-info --context kind-kind
确认上下文是否设置成功:
$ kubectl config get-contexts
CURRENT   NAME        CLUSTER     AUTHINFO    NAMESPACE
*         kind-kind   kind-kind   kind-kind
2.3 启动 k9s
直接运行 k9s 即可启动 TUI 界面:
$ k9s
默认会在 default 命名空间下展示 Pod 资源。
2.4 启动参数
启动时可通过参数指定上下文、资源类型和命名空间:
指定上下文:
$ k9s --context dev指定资源类型和命名空间:
$ k9s -n app -c services启动只读模式(防止误操作):
$ k9s --readonly
3. k9s 界面结构
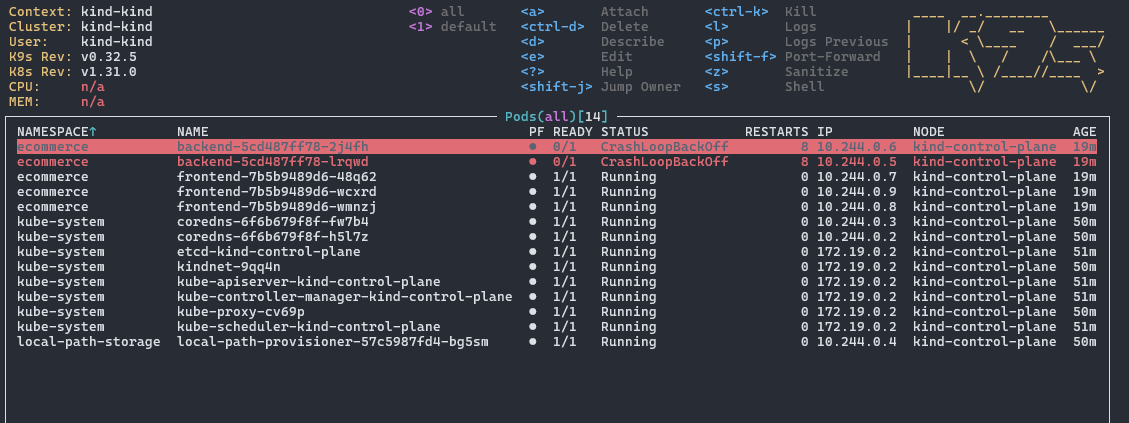
启动后,TUI 会占据整个终端窗口,界面分为两个主要区域:
3.1 头部区域
显示诊断信息和快捷键提示:

左上角显示当前上下文、集群、用户信息和版本号。右上角列出常用快捷键,如 ctrl-d 删除资源。
3.2 主体区域
展示资源列表:

顶部中间显示当前资源类型,括号内为命名空间。下方是资源详细信息,列内容根据资源类型动态变化。
4. 基础导航
k9s 所有操作都通过键盘完成。掌握常用快捷键是关键。
4.1 显示帮助
在任意页面按下 ? 键可打开帮助界面:
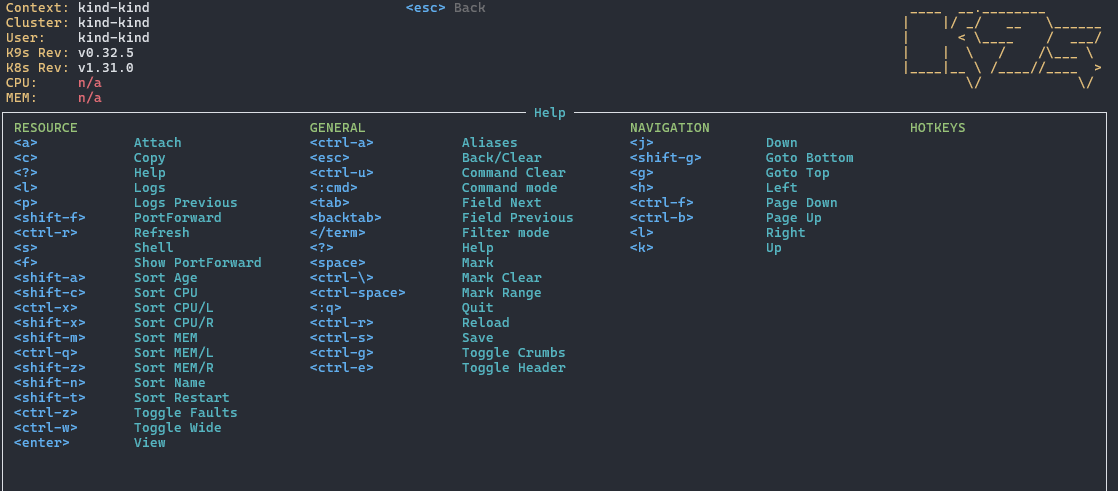
帮助界面分为三列:
- 第一列:当前资源专属快捷键
- 第二列:通用操作
- 第三列:导航操作
4.2 过滤模式
使用 / 键进入过滤模式。例如过滤状态为 CrashLoopBack 的 Pod:
/crashloopback

使用 ! 前缀进行反向过滤:
!crashloopback
支持模糊匹配,使用 -f 参数:
-f backend

按 Esc 键退出过滤模式。
4.3 命令模式
输入 : 键进入命令模式:
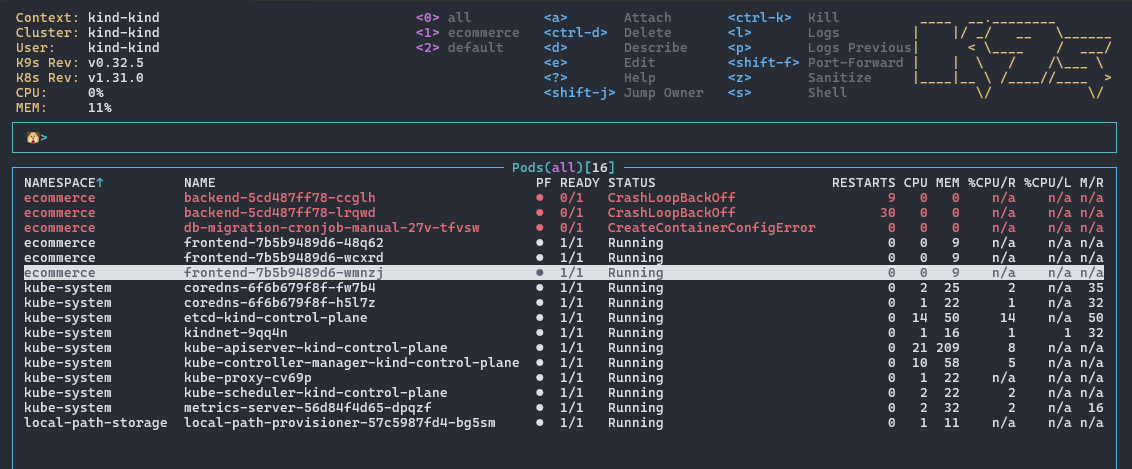
命令模式可用于切换视图、资源类型等操作。
5. 资源导航
k9s 每次仅展示一种资源类型。要切换资源类型,需进入命令模式并输入资源名:
- 服务资源:
:service或:svc - 命名空间资源:
:ns
5.1 切换命名空间
有两种方式切换命名空间:
- 按数字键
0-9(对应表头编号) - 进入命令模式输入
:ns,使用方向键选择命名空间
5.2 切换上下文
进入命令模式输入 :ctx,选择目标上下文。
6. 脉冲视图(Pulse)与透视视图(X-Ray)
这两个视图提供集群资源的宏观视角。
6.1 Pulse 视图
Pulse 视图展示节点和 Pod 的实时资源使用情况。它通过 Metrics Server 获取数据,适合快速了解集群整体健康状态。
进入方式:
:pulse
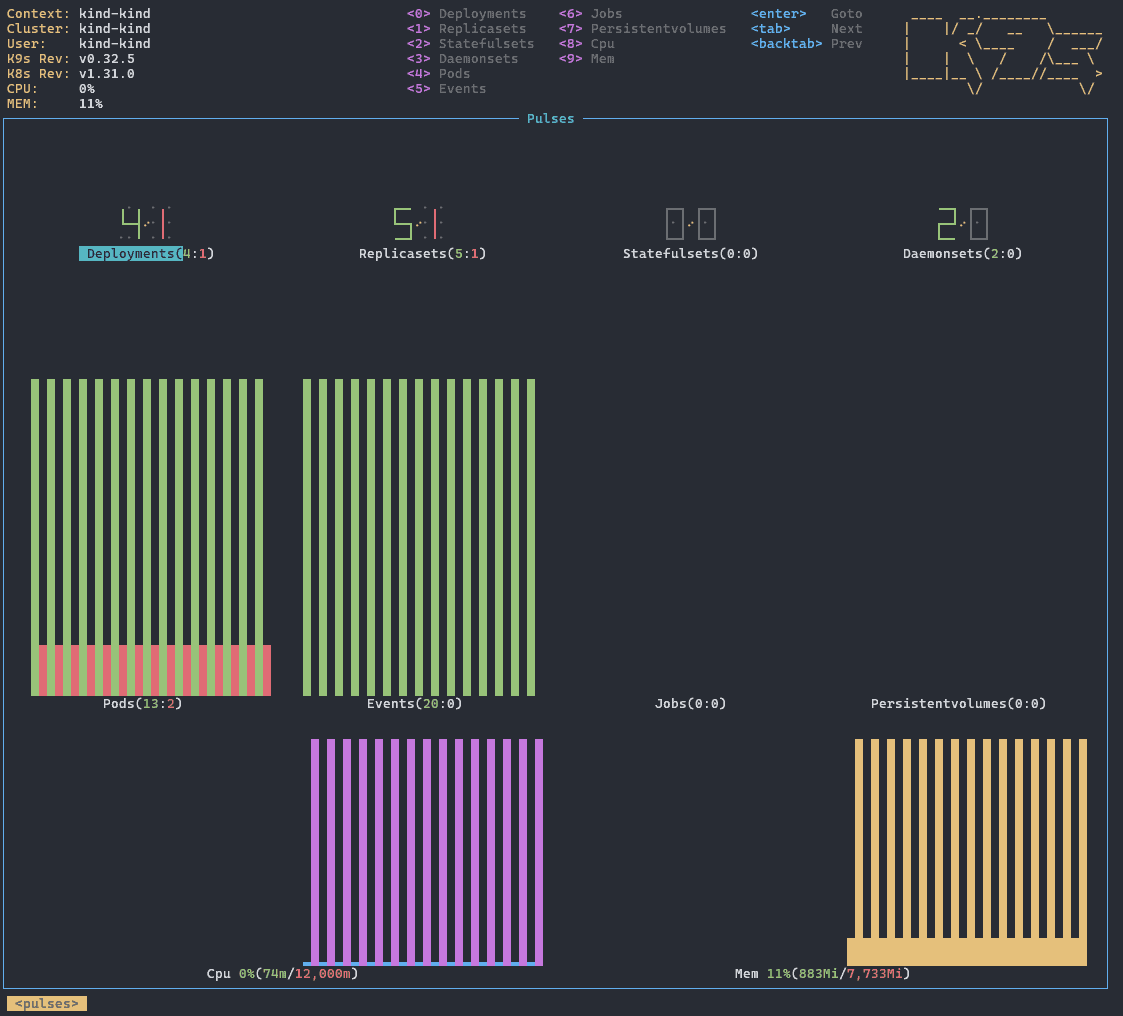
显示内容包括:
- 每类资源数量及健康状态
- CPU 和内存使用率及限制值
6.2 X-Ray 视图
X-Ray 视图展示资源的层级结构,适合查看如 Deployment、CronJob 等复杂资源的父子关系。
进入方式:
:xray deployment
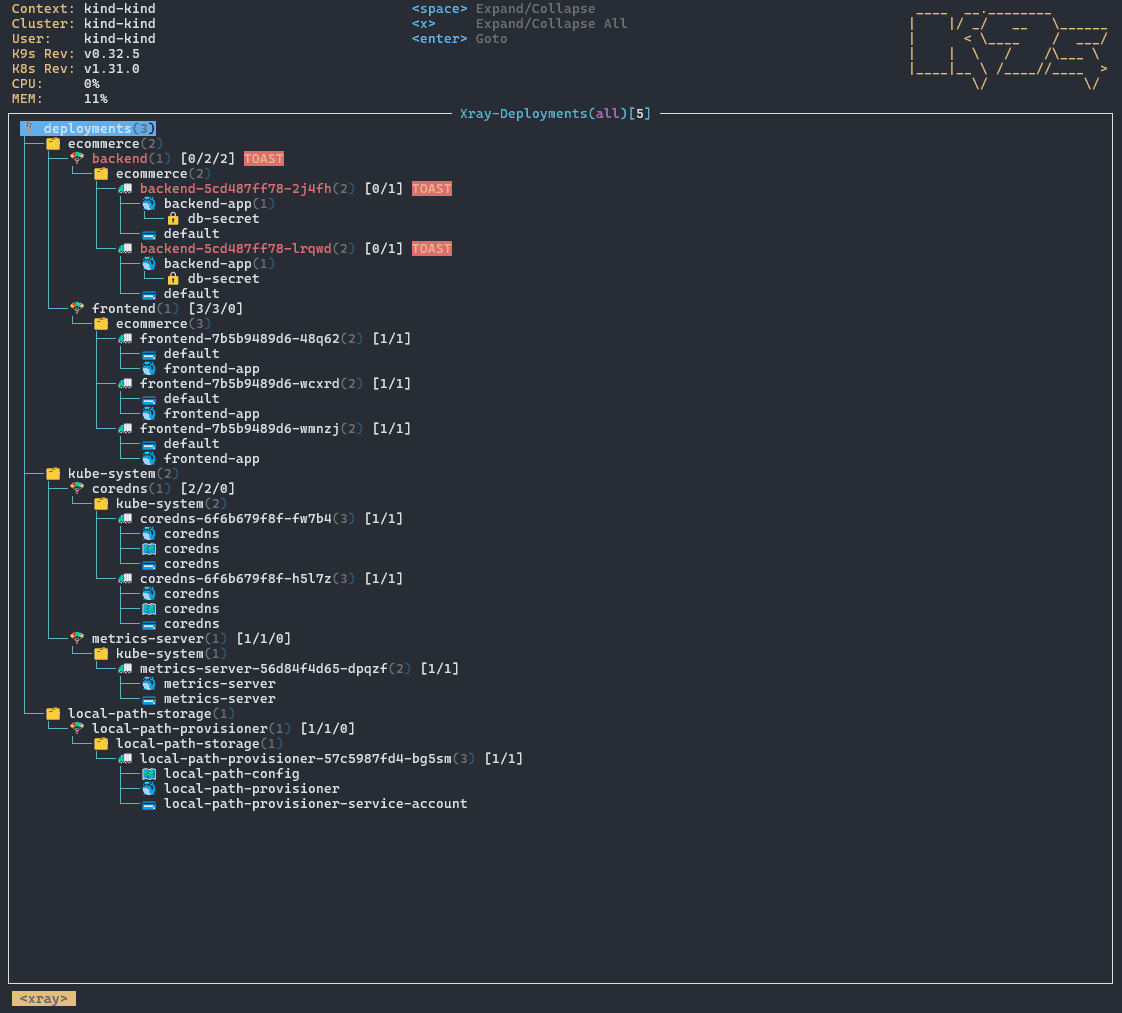
示例结构:
backend deployment
└── backend-5cd487ff78-2j4fh pod
    └── backend-app container
        └── db-secret secret
7. 常用操作示例
以下是一些常见操作的示例,方便快速上手。
7.1 缩放 Deployment
在 Deployment 列表中,按下 s 键:
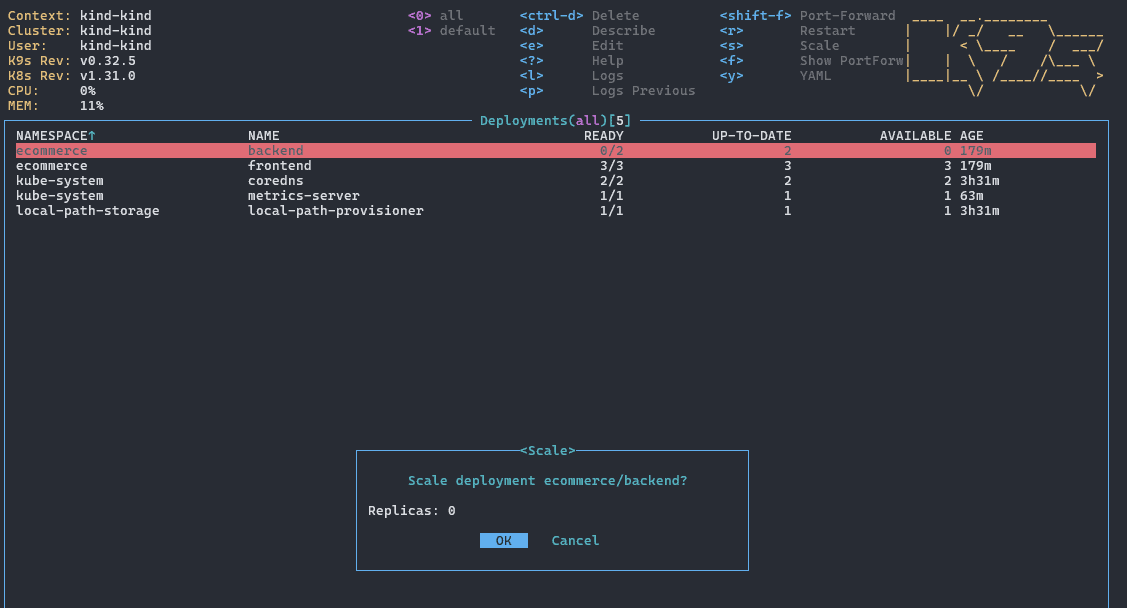
输入目标副本数即可。
7.2 删除资源
使用 ctrl-d 快捷键删除资源:
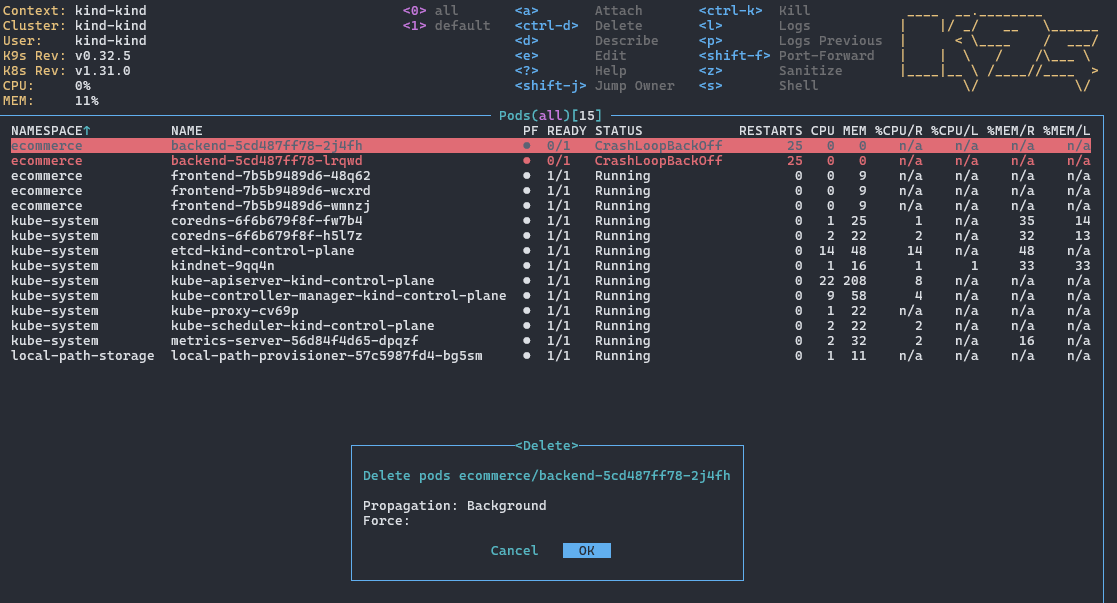
可选择是否强制删除。
7.3 触发 CronJob
在 CronJob 列表中按下 t 键可手动触发执行:
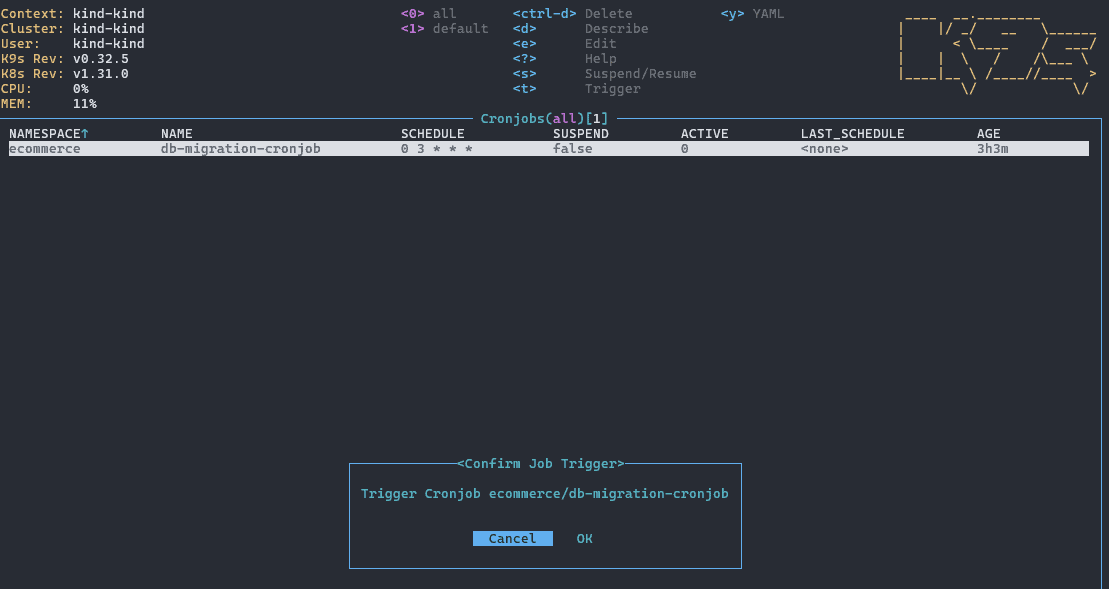
确认后即可执行。
7.4 查看日志
在 Pod、Deployment 或 Job 列表中按下 l 键查看日志:
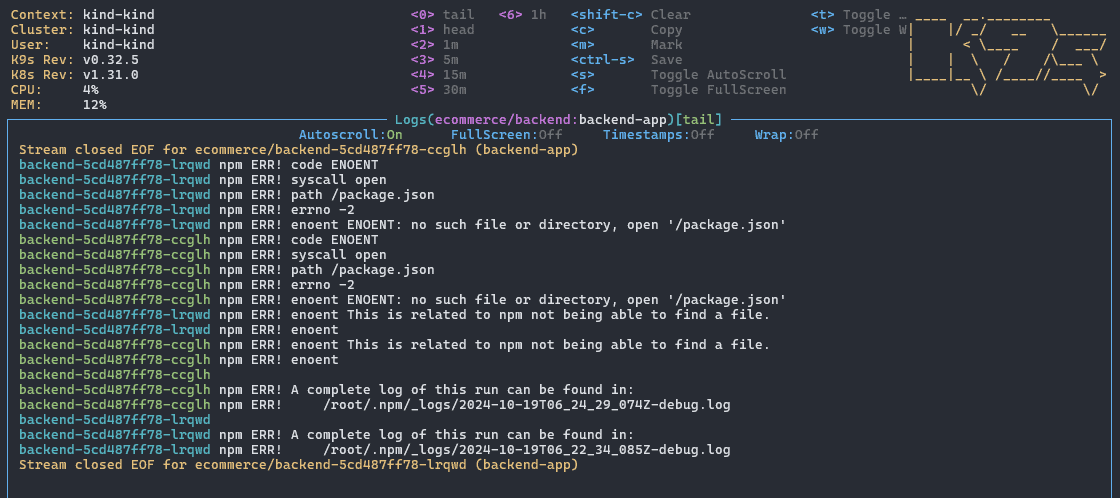
常用操作:
s:暂停/恢复自动滚动w:切换日志换行f:全屏查看日志(便于复制粘贴)
8. 小结
本文从 k9s 的安装讲起,逐步介绍了其基本使用、界面结构、资源导航方式,以及 Pulse 和 X-Ray 视图的用途。
我们还通过多个示例展示了 k9s 的常见操作,如缩放 Deployment、删除资源、触发 CronJob 和查看日志等。
✅ k9s 是一个强大且直观的 Kubernetes 管理工具,尤其适合终端用户提升操作效率。
❌ 但要注意:默认模式下可修改集群资源,建议生产环境使用前切换为 --readonly 模式避免误操作。
⚠️ 熟练掌握快捷键和命令模式是高效使用 k9s 的关键。