1. 概述
本文将探讨 Spring Security 框架在响应式应用安全方面的新特性。该版本与 Spring 6 和 Spring Boot 3 保持同步。
注意:本文不会深入讲解响应式应用本身(这是 Spring 5 的新特性),建议先阅读 Reactor Core 入门 了解基础。
2. Maven 配置
使用 Spring Boot Starter 快速搭建项目并引入所有依赖。
基础配置需要:
- 父项目声明
- WebFlux Starter
- Security Starter
- Spring Security 测试框架
<parent>
    <groupId>org.springframework.boot</groupId>
    <artifactId>spring-boot-starter-parent</artifactId>
    <version>3.1.2</version>
    <relativePath/>
</parent>

<dependencies>
    <dependency>
        <groupId>org.springframework.boot</groupId>
        <artifactId>spring-boot-starter-webflux</artifactId>
    </dependency>
    <dependency>
        <groupId>org.springframework.boot</groupId>
        <artifactId>spring-boot-starter-security</artifactId>
    </dependency>
    <dependency>
        <groupId>org.springframework.security</groupId>
        <artifactId>spring-security-test</artifactId>
        <scope>test</scope>
    </dependency>
</dependencies>
可在 Maven Central 查看最新版本。
3. 项目搭建
3.1. 启动响应式应用
不使用标准的 @SpringBootApplication 配置,而是配置基于 Netty 的 Web 服务器。Netty 是异步 NIO 框架,非常适合响应式应用。
@EnableWebFlux 注解启用标准 Spring Web Reactive 配置:
@ComponentScan(basePackages = {"com.baeldung.security"})
@EnableWebFlux
public class SpringSecurity6Application {

    public static void main(String[] args) {
        try (AnnotationConfigApplicationContext context
          = new AnnotationConfigApplicationContext(SpringSecurity6Application.class)) {
            context.getBean(NettyContext.class).onClose().block();
        }
    }
}
关键点:
- 创建应用上下文
- 调用
.onClose().block()等待 Netty 关闭 - 使用
try-with-resources自动关闭上下文
还需创建 Netty HTTP 服务器、请求处理器及适配器:
@Bean
public NettyContext nettyContext(ApplicationContext context) {
    HttpHandler handler = WebHttpHandlerBuilder
      .applicationContext(context).build();
    ReactorHttpHandlerAdapter adapter
      = new ReactorHttpHandlerAdapter(handler);
    HttpServer httpServer = HttpServer.create("localhost", 8080);
    return httpServer.newHandler(adapter).block();
}
3.2. Spring Security 配置类
创建 SecurityConfig 配置类。**Spring Security 6 中需显式添加 @Configuration**:
@EnableWebFluxSecurity
@Configuration
public class SecurityConfig {
    // ...
}
⚠️ 重要变更:@EnableWebFluxSecurity 和 @EnableReactiveMethodSecurity 不再包含 @Configuration,必须手动添加。
使用 ServerHttpSecurity 构建安全配置(Spring 5 新特性,类似 HttpSecurity 但专用于 WebFlux):
@Bean
public SecurityWebFilterChain securityWebFilterChain(
  ServerHttpSecurity http) {
    return http.authorizeExchange(exchanges -> exchanges
      .anyExchange().authenticated())
      .build();
}
还需响应式用户详情服务:
@Bean
public MapReactiveUserDetailsService userDetailsService() {
    UserDetails user = User
      .withUsername("user")
      .password(passwordEncoder().encode("password"))
      .roles("USER")
      .build();
    return new MapReactiveUserDetailsService(user);
}
注意:用户详情服务必须是响应式的(ReactiveUserDetailsService 的 findByUsername 返回 Mono):
public interface ReactiveUserDetailsService {
    Mono<UserDetails> findByUsername(String username);
}
运行应用后,将看到标准 HTTP Basic 认证表单。
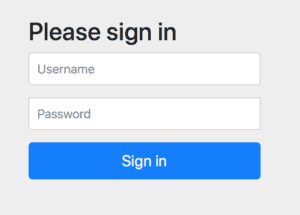
4. 美化登录表单
Spring Security 5 新增基于 Bootstrap 4 的美化登录表单(样式表通过 CDN 加载,需联网)。
启用方式:在 ServerHttpSecurity 中添加 formLogin():
public SecurityWebFilterChain securityWebFilterChain(
  ServerHttpSecurity http) {
    return http.authorizeExchange(exchanges -> exchanges
      .anyExchange().authenticated())
      .formLogin(formLogin -> formLogin
        .loginPage("/login"))
      .build();
}
效果对比:
- 旧版:默认简陋表单
- 新版:Bootstrap 4 美化表单
✅ 虽非生产就绪,但作为应用启动模板足够友好。访问
/logout会看到同样美化的注销确认页。
5. 响应式控制器安全
创建响应式控制器展示认证后的内容:
@RestController
public class GreetingController {

    @GetMapping("/")
    public Mono<String> greet(Mono<Principal> principal) {
        return principal
          .map(Principal::getName)
          .map(name -> String.format("Hello, %s", name));
    }
}
添加管理员专用接口:
@GetMapping("/admin")
public Mono<String> greetAdmin(Mono<Principal> principal) {
    return principal
      .map(Principal::getName)
      .map(name -> String.format("Admin access: %s", name));
}
在用户详情服务中添加管理员用户:
UserDetails admin = User.withDefaultPasswordEncoder()
  .username("admin")
  .password("password")
  .roles("ADMIN")
  .build();
配置 /admin 接口权限(注意匹配器顺序):
return http.authorizeExchange(exchanges -> exchanges
  .pathMatchers("/admin").hasAuthority("ROLE_ADMIN")
  .anyExchange().authenticated())
  .formLogin(formLogin -> formLogin
    .loginPage("/login"))
  .csrf(csrf -> csrf.disable())
  .build();
权限效果:
/:所有认证用户可访问/admin:仅ROLE_ADMIN用户可访问
6. 响应式方法安全
启用方法级安全:在 SecurityConfig 添加 @EnableReactiveMethodSecurity:
@EnableWebFluxSecurity
@Configuration
@EnableReactiveMethodSecurity
public class SecurityConfig {
    // ...
}
创建带权限控制的响应式服务:
@Service
public class GreetingService {

    @PreAuthorize("hasRole('ADMIN')")
    public Mono<String> greet() {
        return Mono.just("Hello from service!");
    }
}
在控制器中调用:
@RestController
public class GreetingController {

    private GreetingService greetingService;

    @GetMapping("/greetingService")
    public Mono<String> greetingService() {
        return greetingService.greet();
    }
}
权限效果:
- 普通用户访问
/greetingService:被拒绝 - 管理员访问:正常返回
7. 测试中的用户模拟
测试响应式应用非常简单。
基础测试类:
@ContextConfiguration(classes = SpringSecurity6Application.class)
public class SecurityTest {

    @Autowired
    ApplicationContext context;

    private WebTestClient webTestClient;

    @Before
    public void setup() {
        this.webTestClient = WebTestClient
          .bindToApplicationContext(this.context)
          .configureClient()
          .build();
    }
}
测试未认证用户重定向:
@Test
void whenNoCredentials_thenRedirectToLogin() {
    webTestClient.get()
      .uri("/")
      .exchange()
      .expectStatus().is3xxRedirection();
}
使用 @WithMockUser 模拟认证用户:
@Test
@WithMockUser
void whenHasCredentials_thenSeesGreeting() {
    webTestClient.get()
      .uri("/")
      .exchange()
      .expectStatus().isOk()
      .expectBody(String.class).isEqualTo("Hello, user");
}
@WithMockUser在 Spring Security 4 已存在,Spring 5 增强了对响应式端点的支持。
8. 总结
本文探讨了 Spring Security 在响应式编程领域的新特性。关键要点:
✅ 核心改进:
ServerHttpSecurity专为 WebFlux 设计- 响应式用户详情服务
- 美化的登录表单
- 方法级安全支持
- 增强的测试工具
完整源码见 GitHub 项目。