1. 简介
OAuth 是一个开放标准,描述了授权流程。它常用于 API 的用户访问授权,例如 REST API 可以限制仅允许拥有适当角色的注册用户访问。
OAuth 授权服务器负责用户认证,并颁发包含用户数据和访问策略的访问令牌(Access Token)。
本文将基于 Spring Security OAuth Authorization Server 实现一个简单的 OAuth 应用。
在这个过程中,我们将构建一个客户端-服务端应用,从 REST API 中获取 Baeldung 文章列表。客户端和服务端都需要进行 OAuth 认证。
2. 授权服务器实现
我们首先来看 OAuth 授权服务器的配置。它将作为文章资源服务器和客户端服务器的统一认证源。
2.1. Maven 依赖
首先,在 pom.xml 文件中添加以下依赖:
<dependency>
    <groupId>org.springframework.boot</groupId>
    <artifactId>spring-boot-starter-web</artifactId>
    <version>3.2.2</version>
</dependency>
<dependency>
    <groupId>org.springframework.boot</groupId>
    <artifactId>spring-boot-starter-security</artifactId>
    <version>3.2.2</version>
</dependency>
<dependency>
    <groupId>org.springframework.boot</groupId>
    <artifactId>spring-boot-starter-oauth2-authorization-server</artifactId>
    <version>3.2.2</version>
</dependency>
2.2. 配置文件
首先创建 application.yml 文件,设置授权服务器监听端口为 9000:
server:
  port: 9000
接着,由于每个授权服务器需要一个唯一的 issuer URL,我们通过以下配置指定:
spring:
  security:
    oauth2:
      authorizationserver:
        issuer: http://auth-server:9000
⚠️ 同时需要在本地 /etc/hosts 文件中添加一行:
127.0.0.1 auth-server
这样可以避免本地运行时客户端和授权服务器之间的 session cookie 冲突。
接下来配置客户端服务的注册信息。本例中我们只注册一个名为 articles-client 的客户端:
spring:
  security:
    oauth2:
      authorizationserver:
        client:
          articles-client:
            registration:
              client-id: articles-client
              client-secret: "{noop}secret"
              client-name: Articles Client
              client-authentication-methods:
                - client_secret_basic
              authorization-grant-types:
                - authorization_code
                - refresh_token
              redirect-uris:
                - http://127.0.0.1:8080/login/oauth2/code/articles-client-oidc
                - http://127.0.0.1:8080/authorized
              scopes:
                - openid
                - articles.read
配置项说明如下:
✅ Client ID:用于标识客户端身份
✅ Client Secret:客户端与服务端共享的密钥,用于建立信任关系
✅ Authentication Method:本例使用 basic 认证(用户名 + 密码)
✅ Grant Types:支持授权码和刷新令牌两种授权方式
✅ Redirect URI:客户端用于重定向的地址
✅ Scope:定义客户端可访问的权限范围,包括标准的 openid 和自定义的 articles.read
然后我们进入 Spring Bean 配置部分。
首先启用 Spring Security 模块,使用 @Configuration 和 @EnableWebSecurity 注解:
@Configuration
@EnableWebSecurity
public class DefaultSecurityConfig {
    // ...
}
接着配置 Spring Security 过滤器链,启用默认的 OAuth 安全配置,并生成默认登录页面:
@Bean
@Order(1)
SecurityFilterChain authorizationServerSecurityFilterChain(HttpSecurity http) throws Exception {
    OAuth2AuthorizationServerConfiguration.applyDefaultSecurity(http);
    http.getConfigurer(OAuth2AuthorizationServerConfigurer.class)
      .oidc(withDefaults()); // 启用 OpenID Connect 1.0
    return http.formLogin(withDefaults()).build();
}
再配置第二个安全过滤器链用于用户认证:
@Bean
@Order(2)
SecurityFilterChain defaultSecurityFilterChain(HttpSecurity http) throws Exception {
    http.authorizeHttpRequests(authorizeRequests -> authorizeRequests.anyRequest()
          .authenticated())
      .formLogin(withDefaults());
    return http.build();
}
这里我们调用 authorizeRequests.anyRequest().authenticated() 要求所有请求都需要认证,并通过 formLogin(withDefaults()) 提供表单登录。
最后定义一个测试用的用户。本例中我们创建一个内存用户:
@Bean
UserDetailsService users() {
    PasswordEncoder encoder = PasswordEncoderFactories.createDelegatingPasswordEncoder();
    UserDetails user = User.builder()
      .username("admin")
      .password("password")
      .passwordEncoder(encoder::encode)
      .roles("USER")
      .build();
    return new InMemoryUserDetailsManager(user);
}
3. 资源服务器
接下来我们创建一个资源服务器,提供一个返回文章列表的 GET 接口。该接口只允许通过 OAuth 认证的请求访问。
3.1. Maven 依赖
<dependency>
    <groupId>org.springframework.boot</groupId>
    <artifactId>spring-boot-starter-web</artifactId>
    <version>3.2.2</version>
</dependency>
<dependency>
    <groupId>org.springframework.boot</groupId>
    <artifactId>spring-boot-starter-security</artifactId>
    <version>3.2.2</version>
</dependency>
<dependency>
    <groupId>org.springframework.boot</groupId>
    <artifactId>spring-boot-starter-oauth2-resource-server</artifactId>
    <version>3.2.2</version>
</dependency>
3.2. 配置文件
在 application.yml 中配置端口和认证服务器地址:
server:
  port: 8090

spring:
  security:
    oauth2:
      resourceserver:
        jwt:
          issuer-uri: http://auth-server:9000
然后配置 Web 安全策略,确保 /articles/** 接口只允许拥有 articles.read 权限的请求访问:
@Configuration
@EnableWebSecurity
public class ResourceServerConfig {

    @Bean
    SecurityFilterChain securityFilterChain(HttpSecurity http) throws Exception {
        http.securityMatcher("/articles/**")
          .authorizeHttpRequests(authorize -> authorize.anyRequest()
            .hasAuthority("SCOPE_articles.read"))
          .oauth2ResourceServer(oauth2 -> oauth2.jwt(Customizer.withDefaults()));
        return http.build();
    }
}
这里调用了 oauth2ResourceServer() 方法,会根据 application.yml 自动配置与授权服务器的连接。
3.3. 文章接口控制器
创建一个 REST 控制器,提供 /articles 接口:
@RestController
public class ArticlesController {

    @GetMapping("/articles")
    public String[] getArticles() {
        return new String[] { "Article 1", "Article 2", "Article 3" };
    }
}
4. 客户端应用
最后我们创建一个客户端应用,用于从资源服务器获取文章列表。
4.1. Maven 依赖
<dependency>
    <groupId>org.springframework.boot</groupId>
    <artifactId>spring-boot-starter-web</artifactId>
    <version>3.2.2</version>
</dependency>
<dependency>
    <groupId>org.springframework.boot</groupId>
    <artifactId>spring-boot-starter-security</artifactId>
    <version>3.2.2</version>
</dependency>
<dependency>
    <groupId>org.springframework.boot</groupId>
    <artifactId>spring-boot-starter-oauth2-client</artifactId>
    <version>3.2.2</version>
</dependency>
<dependency>
    <groupId>org.springframework</groupId>
    <artifactId>spring-webflux</artifactId>
    <version>6.1.3</version>
</dependency>
<dependency>
    <groupId>io.projectreactor.netty</groupId>
    <artifactId>reactor-netty</artifactId>
    <version>1.1.15</version>
</dependency>
4.2. 配置文件
配置客户端认证信息:
server:
  port: 8080

spring:
  security:
    oauth2:
      client:
        registration:
          articles-client-oidc:
            provider: spring
            client-id: articles-client
            client-secret: secret
            authorization-grant-type: authorization_code
            redirect-uri: "http://127.0.0.1:8080/login/oauth2/code/{registrationId}"
            scope: openid
            client-name: articles-client-oidc
          articles-client-authorization-code:
            provider: spring
            client-id: articles-client
            client-secret: secret
            authorization-grant-type: authorization_code
            redirect-uri: "http://127.0.0.1:8080/authorized"
            scope: articles.read
            client-name: articles-client-authorization-code
        provider:
          spring:
            issuer-uri: http://auth-server:9000
创建 WebClient 实例,用于向资源服务器发送请求,并添加 OAuth 认证过滤器:
@Bean
WebClient webClient(OAuth2AuthorizedClientManager authorizedClientManager) {
    ServletOAuth2AuthorizedClientExchangeFilterFunction oauth2Client =
      new ServletOAuth2AuthorizedClientExchangeFilterFunction(authorizedClientManager);
    return WebClient.builder()
      .apply(oauth2Client.oauth2Configuration())
      .build();
}
WebClient 依赖 OAuth2AuthorizedClientManager,我们创建默认实现:
@Bean
OAuth2AuthorizedClientManager authorizedClientManager(
        ClientRegistrationRepository clientRegistrationRepository,
        OAuth2AuthorizedClientRepository authorizedClientRepository) {

    OAuth2AuthorizedClientProvider authorizedClientProvider =
      OAuth2AuthorizedClientProviderBuilder.builder()
        .authorizationCode()
        .refreshToken()
        .build();
    DefaultOAuth2AuthorizedClientManager authorizedClientManager = new DefaultOAuth2AuthorizedClientManager(
      clientRegistrationRepository, authorizedClientRepository);
    authorizedClientManager.setAuthorizedClientProvider(authorizedClientProvider);

    return authorizedClientManager;
}
最后配置 Web 安全:
@Configuration
@EnableWebSecurity
public class SecurityConfig {

    @Bean
    SecurityFilterChain securityFilterChain(HttpSecurity http) throws Exception {
        http
          .authorizeHttpRequests(authorizeRequests ->
            authorizeRequests.anyRequest().authenticated()
          )
          .oauth2Login(oauth2Login ->
            oauth2Login.loginPage("/oauth2/authorization/articles-client-oidc"))
          .oauth2Client(withDefaults());
        return http.build();
    }
}
4.3. 文章客户端控制器
创建一个控制器,使用 WebClient 向资源服务器发送请求并获取文章列表:
@RestController
public class ArticlesController {

    private WebClient webClient;

    @GetMapping(value = "/articles")
    public String[] getArticles(
      @RegisteredOAuth2AuthorizedClient("articles-client-authorization-code") OAuth2AuthorizedClient authorizedClient
    ) {
        return this.webClient
          .get()
          .uri("http://127.0.0.1:8090/articles")
          .attributes(oauth2AuthorizedClient(authorizedClient))
          .retrieve()
          .bodyToMono(String[].class)
          .block();
    }
}
这里通过 @RegisteredOAuth2AuthorizedClient 注解自动绑定授权客户端,并将其用于 HTTP 请求的认证。
4.4. 访问文章列表
访问 http://127.0.0.1:8080/articles 时,会自动跳转到授权服务器登录页:
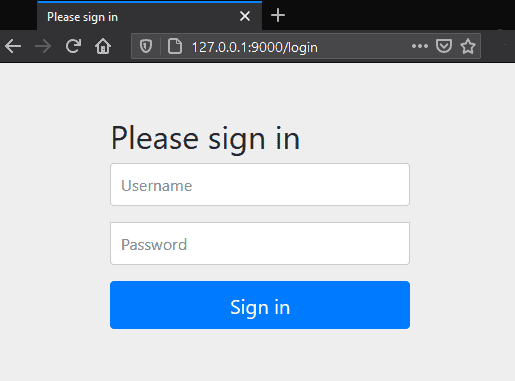
登录成功后,将跳转回目标页面并显示文章列表。后续请求将自动使用 cookie 中的 token,无需重复登录。
5. 总结
本文介绍了如何使用 Spring Security OAuth Authorization Server 实现完整的 OAuth 授权流程。
✅ 完整源码可从 GitHub 获取。