1. 概述
本文将带你掌握如何在 Thymeleaf 模板中正确引入和使用 CSS 样式与 JavaScript 脚本。
我们会先明确推荐的项目目录结构,这是很多初学者容易踩坑的地方。接着演示如何在页面中加载静态资源,并通过实际例子展示 CSS 样式应用和 JS 功能调用。最后还会讲解一个实用技巧:如何把后端 Controller 传递的数据安全地注入到前端 JavaScript 中,避免拼接字符串带来的 XSS 风险。
整个过程简单粗暴,直奔主题,适合已有 Spring Boot + Thymeleaf 使用经验的开发者快速查阅。
2. 依赖配置
要在项目中使用 Thymeleaf,首先需要引入对应的 Starter 依赖。如果你用的是 Maven,添加如下依赖即可:
<dependency>
    <groupId>org.springframework.boot</groupId>
    <artifactId>spring-boot-starter-thymeleaf</artifactId>
    <version>3.1.5</version>
</dependency>
✅ 这个 starter 已经内置了 Thymeleaf 3.x 和 Spring MVC 集成支持,开箱即用。
3. 实战示例
3.1. 目录结构规范
Thymeleaf 对资源文件的存放位置有默认约定,遵循它能省去大量配置工作。
- ✅ 模板文件(.html):放在
src/main/resources/templates/下 - ✅ 静态资源(CSS/JS/图片等):放在
src/main/resources/static/下
我们本次示例的结构如下:
src/
 └── main/
      ├── resources/
      │    ├── templates/
      │    │    └── cssandjs/
      │    │         └── styledPage.html
      │    └── static/
      │         ├── styles/
      │         │    └── cssandjs/
      │         │         └── main.css
      │         └── js/
      │              └── cssandjs/
      │                   └── actions.js
⚠️ 记住:static 目录下的内容会直接映射为应用根路径下的公开资源。
3.2. 引入 CSS 样式
在 static/styles/cssandjs/main.css 中定义基础样式:
h2 {
    font-family: sans-serif;
    font-size: 1.5em;
    text-transform: uppercase;
}

strong {
    font-weight: 700;
    background-color: yellow;
}

p {
    font-family: sans-serif;
}
然后创建 Thymeleaf 模板 templates/cssandjs/styledPage.html,并通过 th:href 引入 CSS:
<!DOCTYPE html>
<html xmlns:th="http://www.thymeleaf.org">
<head>
<meta charset="UTF-8">
<title>Add CSS and JS to Thymeleaf</title>
<link th:href="@{/styles/cssandjs/main.css}" rel="stylesheet" />
</head>
<body>
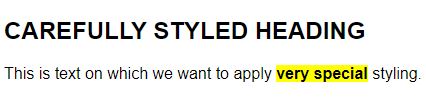
<h2>Carefully Styled Heading</h2>
<p>
This is text on which we want to apply <strong>very special</strong> styling.
</p>
</body>
</html>
关键点:
- ✅
th:href="@{/styles/cssandjs/main.css}":使用 Thymeleaf 的链接表达式,自动处理上下文路径 - ❌ 不要写成
href="/static/styles/...",这是错的!static是内部目录名,不会出现在 URL 中
运行后效果如下:
3.3. 引入并使用 JavaScript
基础 JS 调用
创建 static/js/cssandjs/actions.js 文件:
function showAlert() {
    alert("The button was clicked!");
}
在 HTML 模板中通过 th:src 引入 JS 文件:
<script type="text/javascript" th:src="@{/js/cssandjs/actions.js}"></script>
添加按钮并绑定事件:
<button type="button" th:onclick="showAlert()">Show Alert</button>
点击按钮即可弹出提示框,说明 JS 已成功加载执行。
将后端数据传入 JS(推荐做法)
这是很多人容易写错的地方 —— 直接拼接字符串注入变量,极易导致 XSS 安全问题。
正确做法是使用 Thymeleaf 的 Script Inlining(脚本内联) 机制。
先修改 Controller,传入一个用户名:
@GetMapping("/styled-page")
public String getStyledPage(Model model) {
    model.addAttribute("name", "Baeldung Reader");
    return "cssandjs/styledPage";
}
更新 actions.js,添加接收参数的函数:
function showName(name) {
    alert("Here's the name: " + name);
}
在模板中使用 th:inline="javascript" 将模型数据安全地注入 JS 变量:
<script th:inline="javascript">
    var nameJs = /*[[${name}]]*/ 'default';
</script>
📌 解释:
/*[[${name}]]*/是 Thymeleaf 的内联表达式- 如果
name为 null,会使用'default'作为 fallback 值 - 最终生成的 JS 是:
var nameJs = "Baeldung Reader";
最后调用函数:
<button type="button" th:onclick="showName(nameJs);">Show Name</button>
✅ 这种方式既安全又简洁,是官方推荐的最佳实践。
4. 总结
本文覆盖了 Thymeleaf 中静态资源管理的核心要点:
- ✅ 遵循默认目录结构:模板放
templates,静态资源放static - ✅ 使用
th:href和th:src配合@{...}表达式引用资源 - ✅ 利用
th:inline="javascript"安全地将后端数据注入前端 JS - ✅ 避免手动拼接 JSON 或使用内联 JS 字符串,防止 XSS
所有示例代码均可在 GitHub 获取:https://github.com/eugenp/tutorials/tree/master/spring-web-modules/spring-thymeleaf-3