1. 概述
本文聚焦X.509证书认证的核心应用场景——在HTTPS(SSL加密的HTTP)协议中验证通信方的身份。
简单来说,当建立安全连接时,客户端会根据服务器证书(由受信任的证书颁发机构签发)验证服务器身份。
但X.509在Spring Security中还有更强大的功能:服务器在连接时验证客户端身份。这被称为双向认证,我们将在本文中实现。
最后,我们会探讨何时适合使用这种认证方式。
为演示服务器验证,我们将创建一个简单的Web应用,并在浏览器中安装自定义证书颁发机构。
对于双向认证,我们将创建客户端证书并修改服务器配置,仅允许验证通过的客户端访问。
⚠️ 强烈建议按步骤自行创建证书、密钥库和信任库(后续章节提供详细指令)。所有现成文件可在GitHub仓库获取。
2. 自签名根CA
要签发服务器和客户端证书,需先创建自签名根CA证书——我们将充当自己的证书颁发机构。
使用openssl库(需提前安装)创建CA证书:
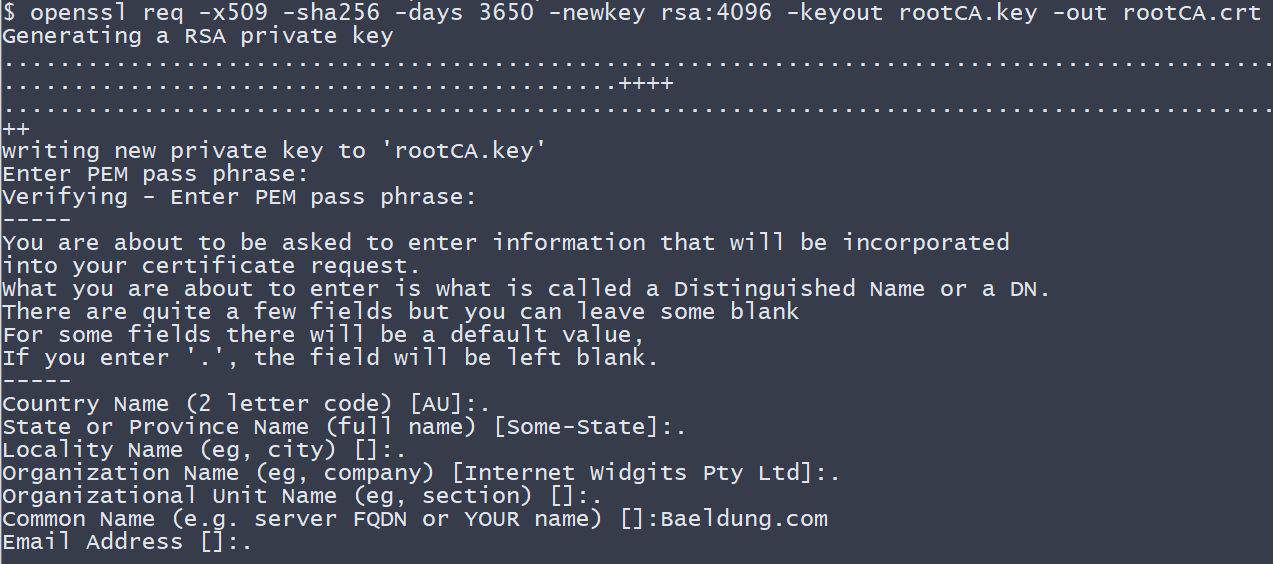
openssl req -x509 -sha256 -days 3650 -newkey rsa:4096 -keyout rootCA.key -out rootCA.crt
执行时需输入私钥密码(本教程使用changeit)。同时需输入构成"可分辨名称"的信息,这里仅提供CN(通用名)Baeldung.com,其他留空。
3. 密钥库
前置要求:要使用加密强度高的密钥,需在JVM中安装*"Java Cryptography Extension (JCE) Unlimited Strength Jurisdiction Policy Files"*。可从Oracle下载(按说明安装),部分Linux发行版可通过包管理器安装。
密钥库是Spring Boot应用存储服务器私钥和证书的仓库。应用在SSL握手时通过密钥库向客户端提供证书。
本教程使用Java Key-Store (JKS)格式和keytool工具。
3.1. 服务器证书
在Spring Boot应用中实现X.509服务器认证,需先创建服务器证书。
创建证书签名请求(CSR):
openssl req -new -newkey rsa:4096 -keyout localhost.key -out localhost.csr
类似CA证书创建,需提供私钥密码,通用名(CN)设为localhost。
创建配置文件localhost.ext存储签名所需参数:
authorityKeyIdentifier=keyid,issuer
basicConstraints=CA:FALSE
subjectAltName = @alt_names
[alt_names]
DNS.1 = localhost
现成文件见此处。
现在用rootCA.crt证书及其私钥签名请求:
openssl x509 -req -CA rootCA.crt -CAkey rootCA.key -in localhost.csr -out localhost.crt -days 365 -CAcreateserial -extfile localhost.ext
需输入创建CA证书时的密码。至此获得由自建CA签发的localhost.crt证书。
用以下命令查看证书详情(可读格式):
openssl x509 -in localhost.crt -text
3.2. 导入密钥库
本节将签名证书和私钥导入keystore.jks文件。
使用PKCS 12归档打包服务器私钥和签名证书,再导入新建的keystore.jks:
openssl pkcs12 -export -out localhost.p12 -name "localhost" -inkey localhost.key -in localhost.crt
现在localhost.key和localhost.crt已打包到localhost.p12文件。
用keytool**创建keystore.jks并导入localhost.p12**:
keytool -importkeystore -srckeystore localhost.p12 -srcstoretype PKCS12 -destkeystore keystore.jks -deststoretype JKS
服务器认证部分准备就绪,接下来配置Spring Boot应用。
4. 示例应用
SSL安全服务器项目包含:
- 标注
@SpringBootApplication的应用类(相当于@Configuration) application.properties配置文件- 简单的MVC前端
应用只需显示包含"Hello {User}!"消息的HTML页面,方便在浏览器中检查服务器证书,确认连接安全。
4.1. Maven依赖
创建Maven项目,引入三个Spring Boot Starter:
<dependency>
    <groupId>org.springframework.boot</groupId>
    <artifactId>spring-boot-starter-security</artifactId>
</dependency>
<dependency>
    <groupId>org.springframework.boot</groupId>
    <artifactId>spring-boot-starter-web</artifactId>
</dependency>
<dependency>
    <groupId>org.springframework.boot</groupId>
    <artifactId>spring-boot-starter-thymeleaf</artifactId>
</dependency>
参考:依赖可在Maven Central获取(security, web, thymeleaf)。
4.2. Spring Boot应用
创建主应用类和控制器:
@SpringBootApplication
public class X509AuthenticationServer {
    public static void main(String[] args) {
        SpringApplication.run(X509AuthenticationServer.class, args);
    }
}

@Controller
public class UserController {
    @RequestMapping(value = "/user")
    public String user(Model model, Principal principal) {

        UserDetails currentUser
          = (UserDetails) ((Authentication) principal).getPrincipal();
        model.addAttribute("username", currentUser.getUsername());
        return "user";
    }
}
配置应用定位keystore.jks并启用SSL,修改监听端口表示安全连接。同时配置Basic认证的用户信息:
server.ssl.key-store=../store/keystore.jks
server.ssl.key-store-password=${PASSWORD}
server.ssl.key-alias=localhost
server.ssl.key-password=${PASSWORD}
server.ssl.enabled=true
server.port=8443
spring.security.user.name=Admin
spring.security.user.password=admin
HTML模板(位于resources/templates):
<!DOCTYPE html>
<html xmlns:th="http://www.thymeleaf.org">
<head>
    <title>X.509 Authentication Demo</title>
</head>
<body>
    <h2>Hello <span th:text="${username}"/>!</h2>
</body>
</html>
4.3. 根CA安装
访问站点前,需将自建根证书安装为浏览器受信任证书。
Firefox安装步骤:
- 地址栏输入
about:preferences - 打开
Advanced -> Certificates -> View Certificates -> Authorities - 点击
Import - 定位到
Baeldung tutorials/spring-security-x509/keystore目录 - 选择
rootCA.crt文件并点击OK - 勾选"Trust this CA to identify websites"并点击
OK
⚠️ 若不信任此CA,后续可手动添加例外访问站点(但地址栏会显示黄色感叹号)。
运行项目:
mvn spring-boot:run
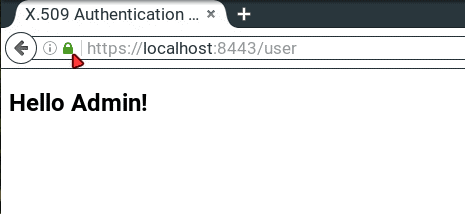
访问https://localhost:8443/user,输入application.properties中的凭据,应显示"Hello Admin!"。点击地址栏绿色锁图标可查看连接状态:
5. 双向认证
前文实现了最常见的SSL认证模式——服务器认证(仅服务器向客户端证明身份)。本节将添加客户端认证,使只有持有服务器信任CA签发证书的客户端才能访问安全站点。
先分析双向SSL认证的优缺点:
优势: ✅ X.509客户端证书的私钥比任何用户密码都强(但需保密!) ✅ 客户端身份明确且易于验证 ✅ 告别密码遗忘问题
劣势: ❌ 需为每个新客户端创建证书 ❌ 客户端证书必须安装到客户端应用(X.509认证依赖设备,无法在公共场景如网吧使用) ❌ 需吊销泄露的客户端证书机制 ❌ 证书维护成本高
5.1. 信任库
信任库可视为密钥库的反面,存储我们信任的外部实体证书。
本例只需在信任库中保留根CA证书。用keytool创建truststore.jks并导入rootCA.crt:
keytool -import -trustcacerts -noprompt -alias ca -ext san=dns:localhost,ip:127.0.0.1 -file rootCA.crt -keystore truststore.jks
需设置信任库密码(本教程使用changeit)。至此信任库准备就绪。
5.2. Spring Security配置
修改X509AuthenticationServer,创建SecurityFilterChain Bean配置HttpSecurity。配置x.509机制从证书的Common Name (CN)字段提取用户名,并通过UserDetailsService验证用户。
生产提示:实际项目中UserDetailsService可从JDBC数据源加载用户。
用@EnableWebSecurity和@EnableGlobalMethodSecurity(prePostEnabled = true)注解类,后者支持@PreAuthorize/@PostAuthorize实现细粒度访问控制:
@SpringBootApplication
@EnableWebSecurity
@EnableGlobalMethodSecurity(prePostEnabled = true)
public class X509AuthenticationServer {
    ...

    @Bean
    public SecurityFilterChain filterChain(HttpSecurity http) throws Exception {
        http.authorizeRequests()
            .anyRequest()
            .authenticated()
            .and()
            .x509()
            .subjectPrincipalRegex("CN=(.*?)(?:,|$)")
            .userDetailsService(userDetailsService());
        return http.build();
    }

    @Bean
    public UserDetailsService userDetailsService() {
        return new UserDetailsService() {
            @Override
            public UserDetails loadUserByUsername(String username) throws UsernameNotFoundException {
                if (username.equals("Bob")) {
                    return new User(username, "",
                     AuthorityUtils.commaSeparatedStringToAuthorityList("ROLE_USER"));
                }
                throw new UsernameNotFoundException("User not found!");
            }
        };
    }
}
因@EnableGlobalMethodSecurity注解,现在可在控制器使用基于表达式的访问控制:
@Controller
public class UserController {
    @PreAuthorize("hasAuthority('ROLE_USER')")
    @RequestMapping(value = "/user")
    public String user(Model model, Principal principal) {
        ...
    }
}
所有授权选项详见官方文档。
最后配置信任库路径并启用SSL客户端认证(server.ssl.client-auth=need):
server.ssl.trust-store=store/truststore.jks
server.ssl.trust-store-password=${PASSWORD}
server.ssl.client-auth=need
此时运行应用访问https://localhost:8443/user,浏览器会提示"无法验证对等方"并拒绝访问。
5.3. 客户端证书
创建客户端证书(步骤与服务器证书类似)。
先创建证书签名请求:
openssl req -new -newkey rsa:4096 -nodes -keyout clientBob.key -out clientBob.csr
输入证书信息,**仅设置通用名(CN)为Bob**(因示例应用仅识别Bob)。
用CA签名请求:
openssl x509 -req -CA rootCA.crt -CAkey rootCA.key -in clientBob.csr -out clientBob.crt -days 365 -CAcreateserial
最后将签名证书和私钥打包为PKCS文件:
openssl pkcs12 -export -out clientBob.p12 -name "clientBob" -inkey clientBob.key -in clientBob.crt
在浏览器安装客户端证书(Firefox步骤):
- 地址栏输入
about:preferences - 打开
Advanced -> View Certificates -> Your Certificates - 点击
Import - 定位到
Baeldung tutorials/spring-security-x509/store目录 - 选择
clientBob.p12文件并点击OK - 输入证书密码并点击
OK
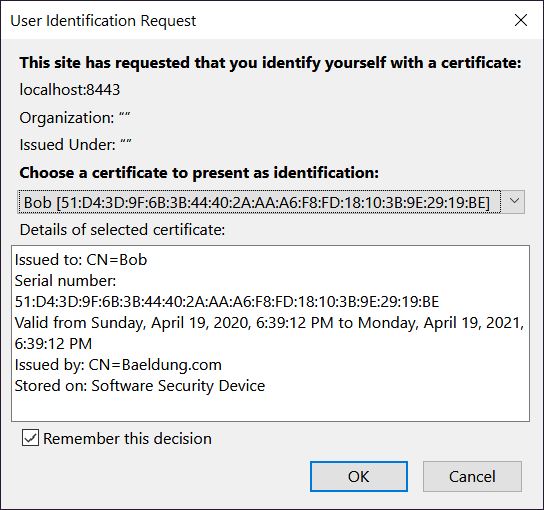
刷新站点时浏览器会提示选择客户端证书:
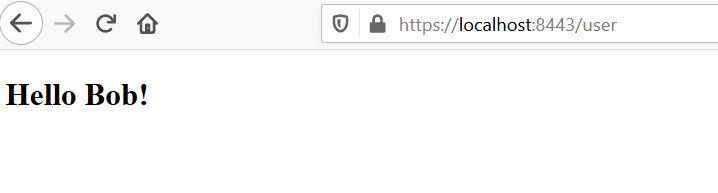
若显示"Hello Bob!"则表示一切正常!
6. XML配置双向认证
在XML的http安全配置中添加X.509客户端认证:
<http>
    ...
    <x509 subject-principal-regex="CN=(.*?)(?:,|$)"
      user-service-ref="userService"/>

    <authentication-manager>
        <authentication-provider>
            <user-service id="userService">
                <user name="Bob" password="" authorities="ROLE_USER"/>
            </user-service>
        </authentication-provider>
    </authentication-manager>
    ...
</http>
配置底层Tomcat:将密钥库和信任库放入conf文件夹,编辑server.xml:
<Connector port="8443" protocol="HTTP/1.1" SSLEnabled="true" scheme="https" secure="true"
    clientAuth="true" sslProtocol="TLS"
    keystoreFile="${catalina.home}/conf/keystore.jks"
    keystoreType="JKS" keystorePass="changeit"
    truststoreFile="${catalina.home}/conf/truststore.jks"
    truststoreType="JKS" truststorePass="changeit"
/>
提示:clientAuth设为"want"时,即使客户端无有效证书仍启用SSL,但需配合其他认证机制(如登录表单)访问安全资源。
7. 总结
本文学习了如何创建自签名CA证书并用其签发其他证书,创建了服务器和客户端证书,演示了如何导入密钥库和信任库。
现在你应该能够将证书与私钥打包为PKCS12格式,并了解Spring Security X.509客户端认证的适用场景。
是否在Web应用中实现此认证,需根据实际需求权衡。
完整源代码见GitHub。