1. Introduction
When we’re developing web applications or configuring network settings, we often need to access services hosted on our local machine. Typically, we use localhost or 127.0.0.1 to refer to the local computer. However, sometimes we encounter a puzzling issue: we can access a service via localhost but not through the IP address 127.0.0.1.
In this tutorial, we’ll explore the reasons behind this problem and discuss practical solutions to resolve it.
2. Understanding localhost and 127.0.0.1
Before diving into the issue, it’s important to understand how localhost and 127.0.0.1 function in networking.
The IP address 127.0.0.1 is the standard loopback address in IPv4 networking. It establishes an IP connection to the same machine, allowing inter-process communication over TCP/IP without involving external network interfaces.
The term localhost is a hostname that refers to the current computer we’re using. When we type localhost into a browser or ping it via the command line, the system resolves it to an IP address using the hosts file.
On most operating systems, the hosts file maps hostnames to IP addresses. A typical hosts file entry looks like this:
127.0.0.1 localhost
This line tells the system that the hostname localhost corresponds to the IP address 127.0.0.1.
3. Common Causes of the Issue
Several factors might be at play if we can access a service using localhost but not 127.0.0.1:
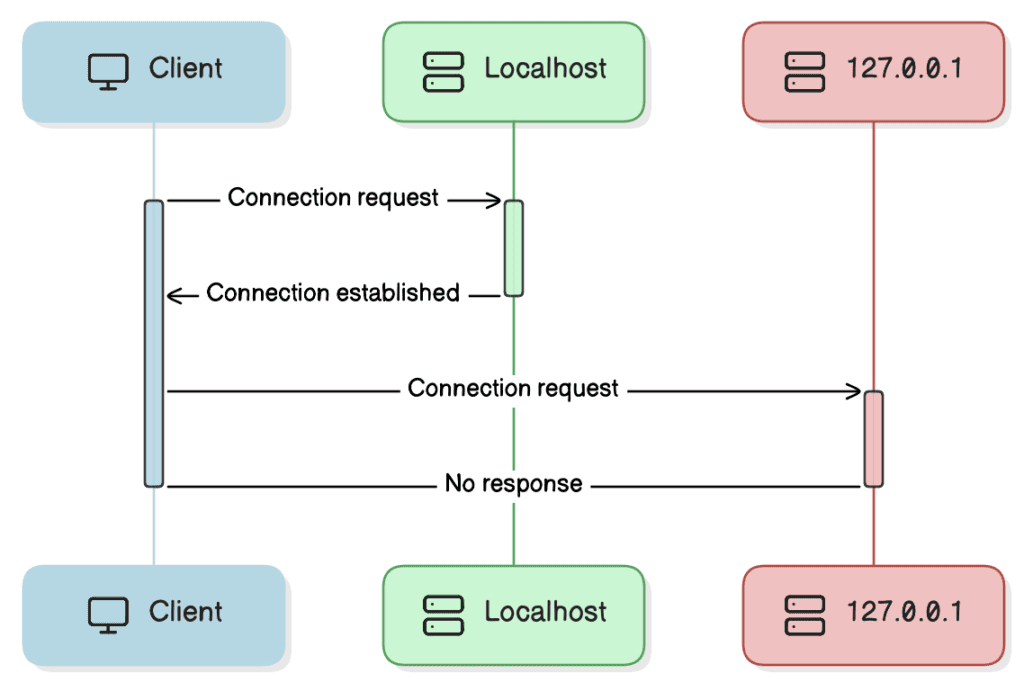
One common cause is that the service is bound only to the loopback interface. Services can be configured to listen on specific IP addresses or hostnames. If a service binds only to localhost or the IPv6 address ::1, it won’t respond to requests made to 127.0.0.1.
Firewall restrictions can also cause this issue. A misconfigured firewall might allow traffic to localhost but block it to 127.0.0.1. This can happen if the firewall rules are set to permit traffic based on hostnames rather than IP addresses.
Web proxy configurations might prevent correct resolution. For example, if a proxy is set up to handle requests differently based on the destination IP or hostname, it might allow localhost but not 127.0.0.1.
4. Troubleshooting Steps
To resolve the issue, we can follow these troubleshooting steps.
4.1. Verify Hosts File Entries
First, we should check the hosts file to ensure that localhost is correctly mapped to 127.0.0.1:
On Windows, the hosts file is located at C:\Windows\System32\drivers\etc\hosts.
On Linux and macOS, the hosts file is located at /etc/hosts.
We need to open the hosts file with administrative privileges and look for entries related to localhost. A correct configuration should include:
127.0.0.1     localhost
::1           localhost
This ensures that localhost resolves to both the IPv4 loopback address 127.0.0.1 and the IPv6 loopback address ::1.
4.2. Check Service Bindings
Services can be configured to listen to specific IP addresses. If a service is bound only to localhost or::1, it may not accept connections to 127.0.0.1.
So, we should verify that the service we’re trying to access is bound to the correct network interfaces.
The netstat command can be used to check which IP addresses and ports services are listening on.
Let’s see how to check it on Windows:
netstat -ano | findstr LISTENING
On Unix-based systems:
sudo netstat -tuln
If the service is listening only on ::1 or localhost, we’ll need to update its configuration to listen on the IPv4 loopback address.
For example, in a web server configuration file, we might find:
listen localhost:8080;
What happens if we change this line to:
listen 0.0.0.0:8080;
The address 0.0.0.0 represents all IPv4 addresses, so binding the service to all IPv4 interfaces will allow connections via 127.0.0.1.
When we bind a service to 0.0.0.0, we instruct it to listen on all available IPv4 interfaces, including localhost, 127.0.0.1, and the machine’s actual IP address.
While binding to 0.0.0.0 allows greater accessibility, it also exposes the service to all network interfaces, which might include public networks if the machine is not behind a firewall. Therefore, we should ensure that appropriate security measures are in place, such as firewalls and authentication mechanisms.
If we only need the service accessible on the local network, we can bind it to the specific local IP address instead of 0.0.0.0. For example:
listen 10.0.0.16:8080;
Someone might ask – why not specify 127.0.0.1? As discussed above, specifying 127.0.0.1 binds the service only to the loopback interface, making it inaccessible to other devices on the network and from the machine’s IP address. That’s why if we want the service to be accessible via the local IP, we need to bind it to either 0.0.0.0 or the specific local IP address.
4.3. IPv6 vs. IPv4
Since localhost may resolve to ::1, our system might prioritize IPv6 over IPv4. To test this, we can ping localhost:
ping localhost
If the response comes from ::1, it indicates that localhost is resolving to the IPv6 loopback address. We can attempt to access the service using the IPv6 loopback address [::1] in our browser or application.
If the service doesn’t support IPv6, we might need to adjust the system’s network settings to prioritize IPv4. On some systems, we can modify the hosts file to prioritize IPv4 by ordering the entries:
127.0.0.1       localhost #first
::1             localhost #second
Alternatively, we might consider temporarily disabling IPv6 for testing purposes. However, we should be cautious with this approach, as it can affect other network functionalities.
4.4. Review Firewall Settings
Firewalls can block incoming or outgoing traffic on certain interfaces or IP addresses. We should check our firewall configuration to ensure it doesn’t block traffic to 127.0.0.1.
We can access the Windows Defender Firewall settings on Windows and verify that our application is allowed through private and public networks.
On Linux, we can list current firewall rules using iptables:
sudo iptables -L -v -n
We need to ensure that rules permit traffic on the loopback interface. If necessary, we can add rules to accept input and output on the loopback interface:
sudo iptables -A INPUT -i lo -j ACCEPT
sudo iptables -A OUTPUT -o lo -j ACCEPT
4.5. Test Connectivity with Networking Tools
We can use tools like telnet or curl to test connectivity to 127.0.0.1.
Let’s see the telnet first:
telnet 127.0.0.1 8080

Trying 127.0.0.1...
Connected to 127.0.0.1.
Escape character is '^]'.
If the connection is established, it means the service is accessible on that IP and port. If it fails, we’ll see:
telnet: Unable to connect to remote host: Connection refused
Same with curl. Let’s connect to an API responding with “Hello World”:
curl http://127.0.0.1:8080

Hello, World!
If the service responds with the expected content, the connection is successful. If we receive an error such as “Connection refused” or “Couldn’t connect to the server,” the service isn’t accessible via 127.0.0.1.
5. Conclusion
In this article, we discussed the importance of correct configuration for accessing services on our local machine via localhost and 127.0.0.1. Differences in service bindings, IP versions, firewall settings, and hosts file configurations can lead to connectivity issues.